Wednesday, December 30, 2009

Closing the Crankcase


I had been dreading this for quite some time, but it turned out that it wasn't bad at all. Over the last few nights I worked on cleaning and inspecting the the transmission, and everything was perfect. So tonight I installed the crank and the mainshaft in one half of the crankcase. I installed the mainshaft so I would have something to tap on with the mallet to separate the crankcase halves after they were torqued together.


I needed to shim the crankshaft so there was zero endfloat while it still spun freely. The crankcase gasket needed to be accounted for, but I didn't want to set up the cases with the actual gasket in case I damaged it somehow and would need to buy a new one. The gasket was .010 inches thick, so I spent a bit of time micing every sheet of paper around the house to find something compatible. I was surprised how thin most paper was, but eventually I found some manilla folders that were exactly .010" thick. I cut them into strips to serve as the gaskets during mock-up. The pic is a bit blurry, but you get the idea...


I then installed the other half of the crankcase and torqued the fasteners. Surprisingly, on the first try I got zero end float with a free-rotating crank. Of course, it was the same thickness shim as was installed before the crank rebuild, so I probably wasn't that lucky.


I then re-separated the crankcases and installed the transmission in one half, along with the crankshaft. I shifted through all the gears to make sure everything worked smoothly. Yes, I'm doing this on the kitchen stove, as it's REALLY cold in the garage. And yes, Tami is out of town.


The other side of the crankcase got the lower bevel gear installed.


Once the crankcases were put together I again shifted through all five gears to make sure everything was kosher. I then spent a little over an hour trying several different shim sets to set the final gear mesh/lash on the lower bevel. I finally settled on the same shims that I removed when I disassembled the motor. These shims allowed a little bit of backlash, but they didn't cause any sticking through many rotations, and they resulted in the factory grind marks to align perfectly, so I left it at that.

Sunday, December 20, 2009

Wheels Finished


Got the front wheel trued and installed today. Like the rear, the bead wouldn't seat, so I figured I'd just come back to them when it's warmer. The garage only gets to about 50 degrees, so the tires might just be too cold. I still need to balance both wheels, too.

With both wheels installed, I put on the gas tank and front fender. I wasn't sure I'd like the scrambler tank, but I think its a good shape for a cafe racer. The shiney wheels and fender make the rest of the bike look like crap, though. It's definately getting a coat of paint this winter.


Here's another from the front. There's not a lot of room in the garage, so the camera angles aren't that great.

Friday, December 18, 2009

New Wheels and Tires


My original intent was to make the bike mechanically sound and ride it without too much concern for the cosmetics, but the rims and spokes were horrible. Do get by inexpensively, I bought a set of reproduction CB350 spokes and spent many months waiting for appropriate alloy rims to appear on eBay. I finally found two rims decribed as "straight and no cracks" and bought both of them, only to discover that both WERE cracked, one horribly so (I hate eGay, sometimes).


Not willing to wait another six months only to receive more broken crap, I ponied up and bought myself a set of new Excel rims for Christmas. Since I was spending that kind of cash, I figured I'd splurge and get Buchanan's stainless spokes, too. Pricey, but they are very nice! Coupled with a set of Avon Roadrunner tires, I now had almost as much into the wheels as I had paid for the bike.


It just wouldn't be right to run a ratty bike on such nice wheels, so I spent about six hours this last week sanding out a few deep scratchs on the rear hub, followed by another couple hours of polishing. The hub flanges are now very shiney, but I just couldn't bring myself to spend any more time on the inside ribs, especially since that area gets filthy and is hard to reach on the bike, anyway.


For some reason, a lot of people are afraid of building wheels, but I rather enjoy it. The truing can take a bit of patience, but I find it relaxing and quite satisfying once the process is finished. Lacing a wheel is pretty straightforward - simply replace the spokes as they were originally installed, keeping in mind that inner and outer spokes are a little different shape.


Ducati casserole, anyone? While I was truing the rear wheel on the bike I also worked to replace all the bearings in the engine cases. Today was a good day, since Tami was off teaching and I could commandeer both the oven and the kitchen counter. The bearing are supposed to "fall out" at 200 degress, but of course that didn't happen. Most of the bearings are accessible from from the both sides and can be driven out, except for one. Fortunately, I found a product called Freeze-Out. I froze the bearing after heating the cases and it worked pretty well.


Oh yeah, I left the bearings in the freezer overnight with the peas. With the cases hot they dropped right in.


Nicely cleaned engine cases with all new bearings. They're all set to shim the crankshaft.


No matter what I tried, I could not get the bead to seat on the new Avon tire, so I finally gave up and simply inflated the tire so I could install the wheel, turn the bike around on the table, and start working on the front wheel. All that new shineyness makes the rest of the bike look pathetic.


Keba is supervising the lacing of the front wheel - he needs to be involved in everything. The wheel is actually laced wrong in this pic. Apparently the old 19" wheel was laced differently than the 18" I'm replacing it with. I laid the spokes the same as the old wheel, but it wouldn't lace. I had to alter the pattern to make it work with the new rim.


I got the front wheel laced, and hopefully tomorrow I'll get it trued and installed.

Keba the happy helper cat says "Merry Christmas!"

Monday, December 7, 2009

Ducati's Return

Fall got away from me work-wise, and I never did send off the crankshaft to Syd's Cycles for rebuild. When November rolled around, however, I decided to just drive the crank and cylinder down to St. Petersburg, Florida, and then do some cave diving while I waited.

I departed Madison the first week in November, and 23 hours later I arrived at Syd's door. Malcom welcomed me in and gave me a tour of the place before we settled down to discussing my parts. I had never seen an intact Ducati single outside of photos, so the place was like a museum - a Monza, Mach 1, Mark 3, and several others were around the shop. A couple motors were in the process of being rebuilt, and I asked a lot of questions and soaked in as much information as possible.

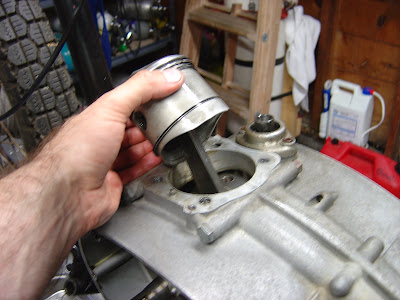
Two weeks later I returned to pick up my newly rebuilt crank with a new connecting rod assembly, a cylinder bored .020 over with a new forged piston, as well as all new bearings, gaskets, and seals. I forgot to take a pic of the shop.

I haven't accomplished much since my return. I had to hone the crank journals with emory cloth in order to get a nice fit on the main bearings, I've rebuilt and shimmed the lower bevel housing, and I've cleaned up the engine cases. I did order new wheels, spokes, and tires, so more updates should be coming soon.


The bearings shields will be removed before the bearings are installed in the cases.

Tuesday, August 18, 2009

She's Alive!!!!


I couldn't wait any longer - the bike was so close to running that I decided to keep working until I had her going. Unfortunately, I was so intent on getting her running that I forgot to take many pics. The first thing I did was make a new wiring harness. I did take a few pics as I was removing the old one, so in the future I will remember where everything went. It was a rat's nest.


With the OEM wiring harness removed I began soldering up a new harness from scratch. This is what I used to guide me - I found it on the internet. It took a couple of hours to cut all the wires to proper length, solder the connectors, and then double check their installation to make sure nothing was crossed. When I installed the battery to test everything I found that I didn't have a tail light. After a bit of troubleshooting, I realized I somehow lost the ground to the tail light, so I simply ran a new ground wire from the tail light housing to the frame and all was good.


With the bike wired I now needed to clean and install the gas tanks. I threw a handfull of nuts into each tank, added a bit of gasoline, inserted ear plugs, and sloshed the mess around to my favorite AC/DC songs. Rinse and repeat until the gas flowed clear. It didn't take too long before both tanks were installed. I then scoured my parts boxes for my old S&S throttle and cables. I installed those, as well as the clutch lever and cable. I then had to fabricate a few new brackets as the smaller Superglide battery tray I was installing didn't fit quite right. After a bit of cutting and grinding, however, in went the new battery and she was ready to start.

It turned out the battery was pretty dead, so I pulled out the jumper cables and hooked them to the Ford Ranger, and after a few turns of the starter she fired to life. I then realized my petcock was leaking badly, so I drained the gas from both tanks, removed the petcock, and headed to the hardware store to buy a rubber faucet washer. I installed the faucet washer and a liberal dose of teflon tape, and the petcock was now gas-tight. I once again hooked up the jumper cables and she was again rumbling in the driveway.

I put about 50 miles on her tonight, and she's a real blast to ride. The front end handles a bit differently than the original one, but I still need to do a little tweeking to get it dialed in. I also need to figure out a front brake. A stop light caught me off guard and I skidded to a stop in the nick of time. Riding without a front brake is definately not something you want to do in the city.

Here she is after her inaugural ride:

She's Rolling!


This weekend I picked up the fork legs from the welder, as well as the new neck stem and axle that I had turned. Everything looked great and I was excited to get the front end on the bike to see what she looked like. While I was waiting on the parts I had cleaned, greased, and reassembled the rest of the front end, so putting it on the bike would be fast.


I greased the neck bearings, slid the neck into place, and installed it on the frame - the neck fit perfectly (I was a little bit worried). I installed the fork legs, wheel and axle, and again everything was perfect. I then bolted on a set of 3.5 gallon tanks. I got a great deal on these tanks, and they are much smaller physically than the 5 gallons tanks I had - much more appropriate for the slimmer front end (I just need to paint them). She was now a rolling bike!


I bolted on the only set of handle bars I had and rolled her out onto the lawn to take some pics. I don't really care for the handlebars, and I think the rear fender is too large, but that is what I have to work with for now. I still need to remove the horns, remove the OEM wiring harness and make a new one, and figure out a front brake, but here's what she looks like now:


Sunday, August 9, 2009

My New Fork Legs


I spent several hours today filing and fitting. So much so I felt like my arms were going to fall off, but I finally had axle plates.


I then tack-welded them onto the fork legs. I'll have to farm out the welding, as I can't run a tip big enough on my little acetylene bottle to weld 3/4" steel effectively (or safely). It took forever just to get the steel hot enough for tack welds with my #2 tip, but it did work.


I bolted the legs on the bike and set the frame level. The wheel's axle hole was 1.5" above the holes in the axle plates - exactly where I wanted it. Once the weight of the bike is on the forks it should sit perfectly. Now all I need is to get the legs welded up and a proper neck made for the triple trees and I can mount the forks. I still need to figure out a brake caliper mount, but I haven't found a caliper yet, so that will have to wait.

Saturday, August 8, 2009

I'm Copperman!

Today I felt like the old Iron Horse's Chopperman! For the first time I used both a hacksaw and a cutting torch on my Harley (on the girder front end, at least). I installed the front end (with bearings), and then measured three times to make sure I had the right fork length before doing any cutting. The forks compressed 1.5" under load, so I set the frame level, measured to the center of the axle hole in the 21" wheel, and then lengthened the cut by 1.5". I made the cuts with a hacksaw using hose clamps to guide the cut and make sure it was square. The fork legs were 3/4" solid stock, so it took forever with a hacksaw!


I then needed to bend the aft leg so the bottom wasn't too wide and looked hacked. The original space was 1" between legs on the bottom, so I set up a jig with a 1" piece of pipe as a bottom spacer to bend the legs together.


Then all I had to do was apply heat to get a nice smooth bend where P&P orginally bent the leg. I was VERY carefull not to touch that oxygen lever, as this is the cutting head for the torch (you'll see what that can do next). Never mind the pile of junk in the background - I'm also working on my boat. This really is relevant to Ducatis, as the tube I'm using to radius the bend is a piece of Ducati fork tube!


None of the local steel suppliers were open on the weekend, so I decided to reuse the original axle plates and cut them out with the torch. It was getting dark and I figured the neighbors would kill me if I started running my angle grinder all night, so fitting the axle plates to the legs will have to wait for tomorrow.

Thursday, August 6, 2009

Digression

It's been a while since my last post, but late summer is my busy season at work (I did warn you this would be a longer project). I also haven't found anyone local to rebuild my crank. I've taken it to a few local shops, but lets say none have instilled any confidence, whatsoever. So.....I'm going to send it off to Syd's Cycles in St. Pete, FL. I just need to call them. Hopefully I'll get it off next week.

In the meantime, I've decided to completely digress from the intended topic of this blog - narrowcase Ducatis - and highlight another project I've started: I've owned the same '72 shovelhead Harley for 15 years. I've ridden this bike from the Pacific to the Atlantic, and I vowed that I would never sell it. Over the last two summers, however, I haven't even burned a full tank of gas through it. I even began contemplating selling it to buy a different Harley project - my stock FLH was simply too nice to chop out, I thought.


My shovelhead on her last road trip in 2006. I finally completed the Pacific-to-Atlantic tour I started in 1994. I've now ridden this bike through nearly every state north of the Mason-Dixon.


Well, I figured why not turn my nice ol' Electraglide into something that peaked my interest a bit more. The only rules I set for myself was not to cut or sell any of the original parts. That way, 10-20 years down the road I could restore the bike to original condition and have a nice old Harley without breaking the bank or having to scour the world for parts.


And with those rules I began looking for parts. A few weeks ago I found what I considered the ideal front end - an old girder straight out of the 1970s. I then got a 21" wheel off a 2005 Sportster with a disk brake rotor - stopping is more important to me than looking cool! The only problem is the front end is about 14 inches too long. Nothing a hacksaw and a welder can't take care of, though. You can see the Ducati as a towel rack on the back wall!


Last night I got the ol' FLH stripped down and began fitting the new front end. I'm really liking the looks of this. Hopefully I'll have some time to keep working on it over the next few weeks.

Wednesday, July 1, 2009

Lower Bevel Housing Removal


I spent many hours looking high and low for the special Ducati tool to remove the lower bevel bearing housing from the case, but I only found one very expensive tool for a twin. After turning up nothing but dead ends I posted the question to the Bevelheads listserve, and Mr. Frank Scurria himself answered my question. It turned out the housing can be removed without the special tool - simply remove the circlip and shims from the top and tap gently on the bevel gear to move it upwards.


Once the bevel gear nearly touches the engine case, remove the gear and shaft, and then pry the housing out using two screwdrivers and wood blocks (I needed one hand to hold the camera, so this pic is obviously posed). It worked a charm.


Now that the housing is out, I need to order all new engine case bearings ($308) and find someplace trustworthy to rebuild the crank. I also need to decide if I'm going to reuse the original piston and resleeve the cylinder or bore the cylinder and fit a larger piston.


Right now this bike is for sale on eBay with a buy-it-now price of $6500. It's almost exactly what I would like my Ducati to look like, but the only hitch is the cost of the tank and seat. They are handmade by Evan Wilcox in Oregon and cost $2350. I guess I'll wait and see what I end up with by the time I get the engine completed.

Sunday, June 21, 2009

Cleanup Begins

I really abhor Harbor Freight. But as much as I hate cheap, crappy tools, today I went against my morals and purchased their small 6.5 gallon parts washer. I'd been watching Craigslist for some time looking for a decent used one but nothing small ever came up - I don't have room for a large parts washer. So...I dropped $40 on the plastic Harbor Freight model(plastic?!?!). I have to say, however, this parts washer is one of those "my god - why didn't I do this sooner!" type purchases, right up there with my lift table. Cleaning the timing cover - which would have taken forever with my old method, was shiny-clean in a matter of minutes. Awesome!


The washer was just big enough to fit the engine cases, too. Despite a lot of nasty sludge, they cleaned up very well.


I then began the long process of measuring everything to make sure it's still in spec. The oil pump and crankshaft bushing in the timing cover were both fine. The calculator is to convert my measurements to metric, as my micrometer is english.

The piston showed hardly any wear, but the cylinder wall has a few pits and will require an oversize piston once it's cleaned up. I'll also have to fit a new bushing in the connecting rod's small end. I know the big end needs some work, too, but that's getting farmed out to a machine shop. I don't have a press to rebuild the crank.

Saturday, June 20, 2009

Tear Down Part II

The chassis sans motor.

Tonight I removed the engine from the frame and proceeded to split the cases. All the remaining fasteners came out without issue, but I was worried the case halves were sealed together with some unknown adhesive. Every time I handled the cases I got some odd, black gooey stuff on me that wouldn't come off no matter what I tried, and looking at the combustion chamber (combined with a lot of odd nicks on the flywheels), it was obvious that this engine had been opened up previously, most likely after some sort of catestrophic failure.


Something was bouncing around the combustion chamber at some point.


Like the rest of the motor, however, the cases split without issue, as there was no gasket sealer whatsoever between the cases. I removed the crankshaft and all of the transmission, ensuring that I got all of the shims and thrust washers. Everything was zip-tied onto its respective shaft and bagged for later inspection. A cursory inspection showed the transmission was in pretty good shape, but the crankshaft wasn't so happy.


It looked like shafts had been overheated at the journals, as both showed the deep blue of severe heat, and the timing side of the crank even had a piece of a tooth broken off (a bit blurry in the photo).


I was worried that I'd need a new crank assembly, but looking closely at the pics of other cranks on eBay it seemed the bluing was normal? I posted the question to the Bevelheads mailing list, and the consenus was that amount of bluing is not a concern.

A closer inspection of the chip in the timing gear revealed that it was actually the timing mark drilled into the tooth and someone had filled it with white paint. Looks like I may be able to use this crank after all.


With everything spread out all over the garage, the enormity of the whole project hit me - I have a lot of work ahead of me. I also realized I that really need to get a parts washer. I've been making do with the bottom cut out of a fabric softner bottle filled with mineral spirits and a bristle brush, but I think I finally need to step up and invest in a washer with a pump.

Friday, June 19, 2009

Teardown Part I


Today two new tools arrived in the mail just in time for the weekend - a magneto puller and a tool to hold the clutch basket in place for removal. I could have fabricated the clutch tool out of old parts, but I haven't been into Ducatis long enough to have accumulated a collection of old clutch plates and I didn't want to sacrifice the one set I had if I didn't need too. Besides, I love tools, so it was just another reason to add to the collection!


With the new tools the tear down began in earnest. First I removed the clutch and decided to perform a quick inspection to see if I needed new clutch parts. Unlike other bikes I own, unscrewing the clutch springs on a Ducati single doesn't cause anything to go SPROING! Simply loosen all the screws, remove the springs and cups, and then remove the clutch plates.


The clutch plates spec'ed out OK, but the springs need replacing as they came up short on the vernier.

After I had the clutch plates out I decided to open all the engine covers and loosen all five major engine nuts while the clutch was still assembled. This way I could use the new clutch tool to keep everything from rotating while loosening the nuts. Essentially, every nut on the chain side is left hand (except for the sprocket nut), and everything on the primary side is right hand. Everything came loose without problems, so I proceeded to remove everything from the primary side. Here I got confirmation that the entire engine needed a rebuild, as the main crankshaft bearing on the left side is rusted badly.


I continued stripping everything down to the cases, and once again I got confirmation that this engine needed a rebuild in a bad way - I could wobble the connecting rod side to side nearly a quarter inch at the top!?!?! This engine would have self-destructed in short order had I ran it. I'm very surprised I didn't hear a bad knock.

I decided to stop at splitting the cases and leave that for another night. Everything is bagged, tagged, and sorted, and I'll come back to them component by component once I get the bottom end rebuilt and assembled. So far, so good - everything has come apart without problems. I hope the cases come apart just as easy.